Nginx
2022/5/28原创大约 4 分钟约 1116 字
1. Nginx
1.1. 显示目录
location / {
        root /data/www/file                    #指定实际目录绝对路径;
        autoindex on;                            #开启目录浏览功能;
        autoindex_exact_size off;            #关闭详细文件大小统计,让文件大小显示MB,GB单位,默认为b;
        autoindex_localtime on;              #开启以服务器本地时区显示文件修改日期!
  charset utf-8,gbk;     #解决中文乱码问题
}
1.2. 负载均衡
#user  nobody;
worker_processes  1;

#error_log  logs/error.log;
#error_log  logs/error.log  notice;
#error_log  logs/error.log  info;

#pid        logs/nginx.pid;


events {
    worker_connections  1024;
}


http {
    include       mime.types;
    default_type  application/octet-stream;

    #log_format  main  '$remote_addr - $remote_user [$time_local] "$request" '
    #                  '$status $body_bytes_sent "$http_referer" '
    #                  '"$http_user_agent" "$http_x_forwarded_for"';

    #access_log  logs/access.log  main;

    sendfile        on;
    #tcp_nopush     on;

    #keepalive_timeout  0;
    keepalive_timeout  65;
    #配置服务器列表
    upstream dynamic_zuoyu {
        ip_hash;
        #server localhost:8080;
        server www.zmjeep.com:8080 weight=3;
    }
    #gzip  on;

    server {
        listen       80;
        server_name  localhost;

        #charset koi8-r;

        #access_log  logs/host.access.log  main;

        location / {
            root   html;
            index  index.html index.htm;
            proxy_pass http://dynamic_zuoyu;
        }

        location /jsp {
            proxy_pass http://localhost:8080/jeeplus;
            root html;
            index index.html index.htm;
        }
        #error_page  404              /404.html;

        # redirect server error pages to the static page /50x.html
        #
        error_page   500 502 503 504  /50x.html;
        location = /50x.html {
            root   html;
        }

        # proxy the PHP scripts to Apache listening on 127.0.0.1:80
        #
        #location ~ \.php$ {
        #    proxy_pass   http://127.0.0.1;
        #}

        # pass the PHP scripts to FastCGI server listening on 127.0.0.1:9000
        #
        #location ~ \.php$ {
        #    root           html;
        #    fastcgi_pass   127.0.0.1:9000;
        #    fastcgi_index  index.php;
        #    fastcgi_param  SCRIPT_FILENAME  /scripts$fastcgi_script_name;
        #    include        fastcgi_params;
        #}

        # deny access to .htaccess files, if Apache's document root
        # concurs with nginx's one
        #
        #location ~ /\.ht {
        #    deny  all;
        #}
    }


    # another virtual host using mix of IP-, name-, and port-based configuration
    #
    #server {
    #    listen       8000;
    #    listen       somename:8080;
    #    server_name  somename  alias  another.alias;

    #    location / {
    #        root   html;
    #        index  index.html index.htm;
    #    }
    #}


    # HTTPS server
    #
    #server {
    #    listen       443 ssl;
    #    server_name  localhost;

    #    ssl_certificate      cert.pem;
    #    ssl_certificate_key  cert.key;

    #    ssl_session_cache    shared:SSL:1m;
    #    ssl_session_timeout  5m;

    #    ssl_ciphers  HIGH:!aNULL:!MD5;
    #    ssl_prefer_server_ciphers  on;

    #    location / {
    #        root   html;
    #        index  index.html index.htm;
    #    }
    #}

}
1.3. 404错误
 proxy_intercept_errors on;

    error_page  404  /404.html;
    location = /404.html {
       root   D:/wwwroot/nginx-1.19.6/html;
    }
1.4. 405错误
温馨提示
Nginx静态资源通过POST请求提示405错误
server {
   listen       80;
   server_name  域名;

   location /{
      root /www/文件目录;
      index index.html index.htm index.php;
      error_page 405 =200 http://$host$request_uri;
   }
}
1.5. 映射mysql
  stream {
    upstream cloudsocket {
        hash $remote_addr consistent;
        server 10.83.128.202:3306 weight=5 max_fails=3 fail_timeout=30s;
    }
    server {
        listen 3300;#数据库服务器监听端口
        proxy_connect_timeout 10s;
        proxy_timeout 30000s;#设置客户端和代理服务之间的超时时间,如果5分钟内没操作将自动断开。
        proxy_pass cloudsocket;
    }
}
1.6. 自动封闭IP地址
- 在ngnix的conf目录下创建一个blockip.conf文件
- 里面放需要封禁的IP,格式如下
deny 1.2.3.4; - 在ngnix的HTTP的配置中添加如下内容
include blockips.conf;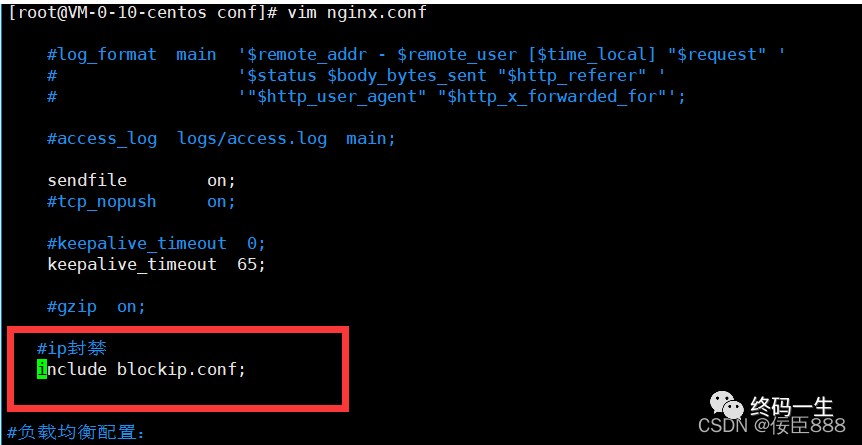
- 重启nginx
nginx -s reload - 然后你就会看到IP被封禁了,你会喜提403
1.6.1. 统计IP地址访问次数
awk '{print $1}' access.log | sort | uniq -cd | awk '{if($1>60)print $0}'
- awk '{print $1}' access.log 取出access.log的第一列即为ip。
- sort | uniq -cd 去重和排序
- awk '{if($1>60)print $0}' 判断重复的数量是否超过60个,超过60个就展示出来
1.6.2. 编写shell脚本,实现整体功能
#不能把别人IP一直封着吧,这里就清除掉了
echo "" > /usr/local/nginx/conf/blockip.conf

#前面最开始编写的统计数据功能
ip_list=$(awk '{print $1}' access.log | sort | uniq -cd | awk '{if($1>60)print $0}')

#判断这个变量是否为空
if test -z "$ip_list"
then
        #为空写入 11.log中,并重新启动ngnix
        echo "为空"  >> /usr/local/nginx/logs/11.log

        /usr/local/nginx/sbin/nginx -s reload

else
        #如果不为空 前面加上 deny格式和ip写入blockip.conf中
        echo "deny" $ip_list > /usr/local/nginx/conf/blockip.conf

        #因为前面携带了行数,所有我们需要去除掉前面的行数,写入后在读取一次
        ip_list2=$(awk '{print $3}' /usr/local/nginx/conf/blockip.conf)

        #最后再把读取出来的值,在次写入到blockip.conf中
        echo "deny" $ip_list2";"> /usr/local/nginx/conf/blockip.conf

        #重启ngnix
        /usr/local/nginx/sbin/nginx -s reload
        #清空之前的日志,从最新的开始截取
        echo "" > /usr/local/nginx/logs/access.log

fi
1.7. 限制IP访问
location / {

  deny    192.168.1.1;

  allow   192.168.1.0/24;

  allow   10.1.1.0/16;

  deny    all;

}

allow:允许访问
deny:限制访问
1.8. 映射mysql
stream {
  log_format basic '$remote_addr [$time_local] $protocol $status $bytes_sent $bytes_received $session_time "$upstream_addr" "$upstream_bytes_sent" "$upstream_bytes_received" "$upstream_connect_time"';
  access_log D:/wwwroot/nginxWebUI/log/stream_access.log basic;
  open_log_file_cache off;
  upstream mysqlBackend{
        hash $remote_addr consistent;
        #原数据库的ip及端口
        server 10.83.128.202:3306;
    }

    server {
        #需要路由的端口
        listen 13306;
        proxy_pass mysqlBackend;
    }
}
1.9. 配置访问密码
1.9.1. 安装htpasswd
yum install -y httpd-tools
扩展:htpasswd参数
-c 创建passwdfile.如果passwdfile 已经存在,那么它会重新写入并删去原有内容. -n 不更新passwordfile,直接显示密码 -m 使用MD5加密(默认) -d 使用CRYPT加密(默认) -p 使用普通文本格式的密码 -s 使用SHA加密 -b 命令行中一并输入用户名和密码而不是根据提示输入密码,可以看见明文,不需要交互 -D 删除指定的用户
1.9.2. 设置用户名和密码
htpasswd -cb /etc/nginx/htpasswd mynginx 123456
1.9.3. 修改Nginx配置
auth_basic "Please enter the user name and password"; #这里是验证时的提示信息
auth_basic_user_file /etc/nginx/htpasswd;